Building Your First Virtual Router Using PFSense/OPNSense and Proxmox
Virtualize PFSense/OPNSense on Proxmox that has only one network card
I've been thinking about virtualizing my router for a long time now. It gives excellent control over what goes in and out of your network. Plus you can do all sorts of cool things like running a VPN server, a recursive DNS server and more. I had a spare laptop lying around that I rarely use. It got a core i7 9th gen, 32 GB ram and 1 TB of SSD, which is more than enough to run proxmox.
Prerequisite
A pc/laptop with a fresh installation of proxmox
OPNSense/PFSense ISO downloaded and uploaded to proxmox
A switch that supports 802.1q port tagging, I used the TP-Link SG108E switch.
Making Proxmox VLAN Aware
When you set up proxmox the first time, it will automatically create a network bridge and most probably the name will be vmbr0. Go to Your Node > Networks and it will look something like below
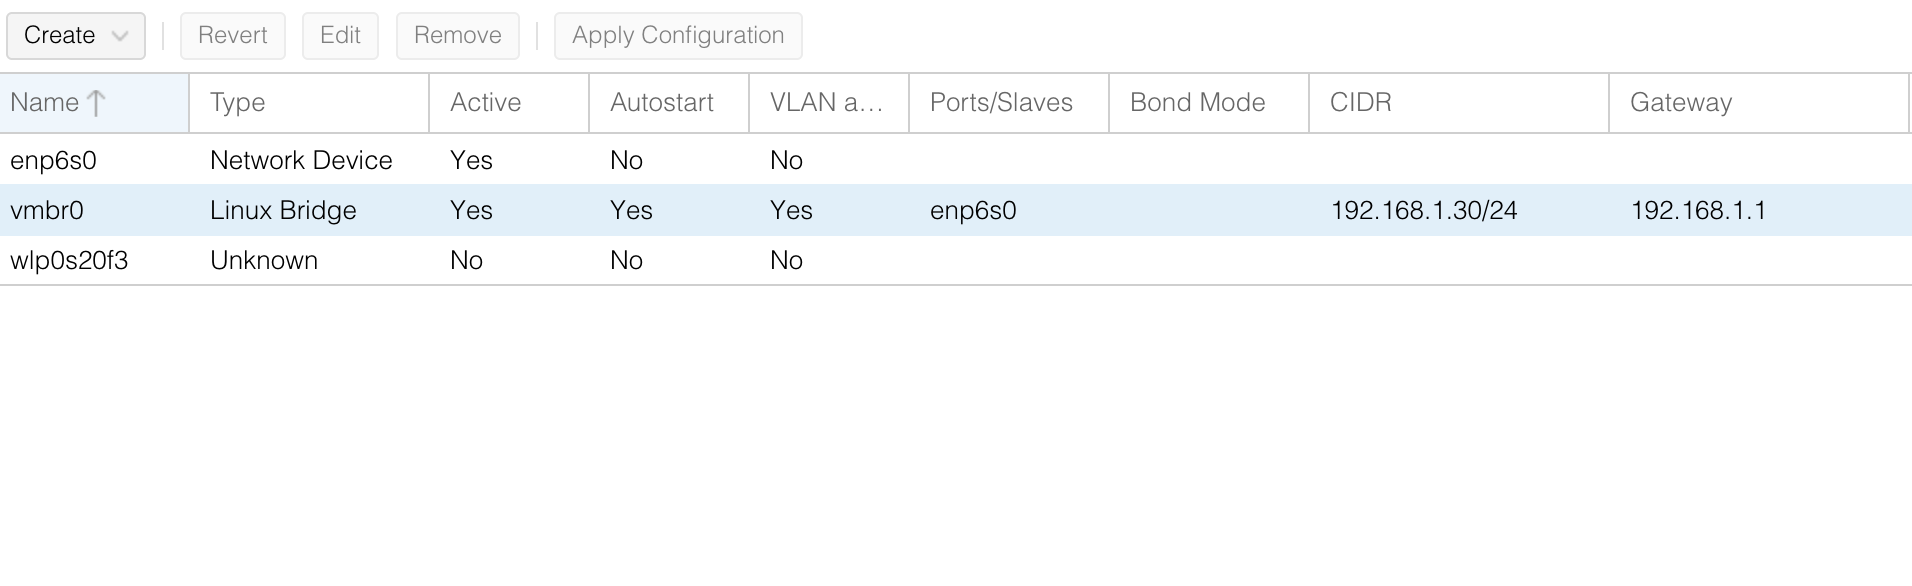
To make your NIC VLAN award, just select the bridge vmbr0 and click edit.
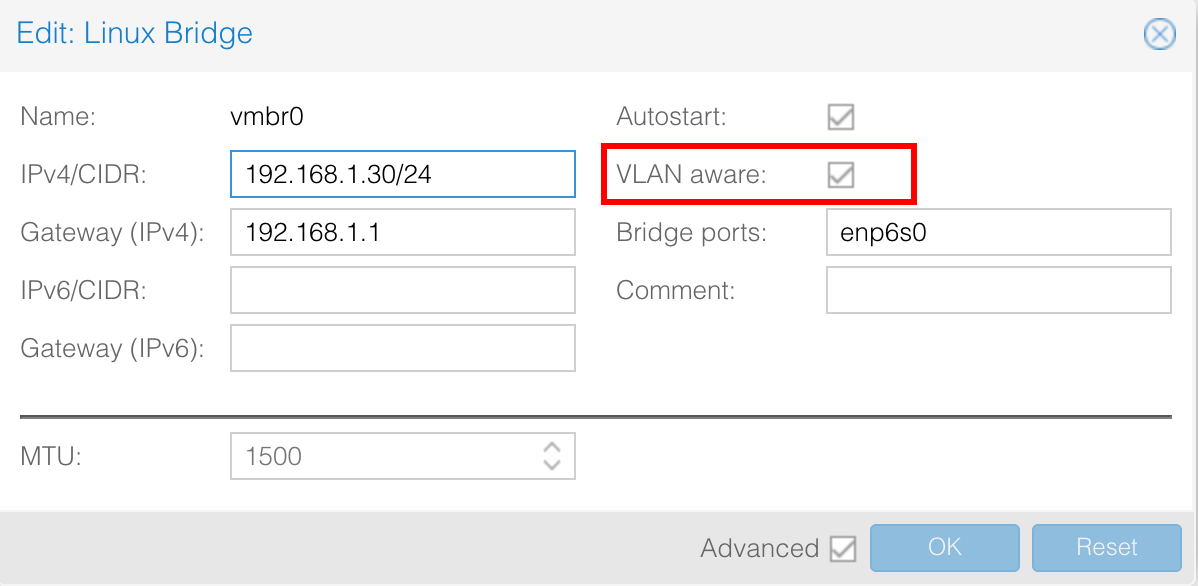
Click the VLAN Aware checkbox and click ok. You will see a button "Apply Configuration", click that and wait for some time for network services to reload.
Congratulations, your proxmox can now receive and send VLAN traffic.
Creating PFSense/OPNSense VM
The next step will be to create a VM and configure network interfaces. So go ahead and create VM and once it's complete go to the hardware tab of the VM
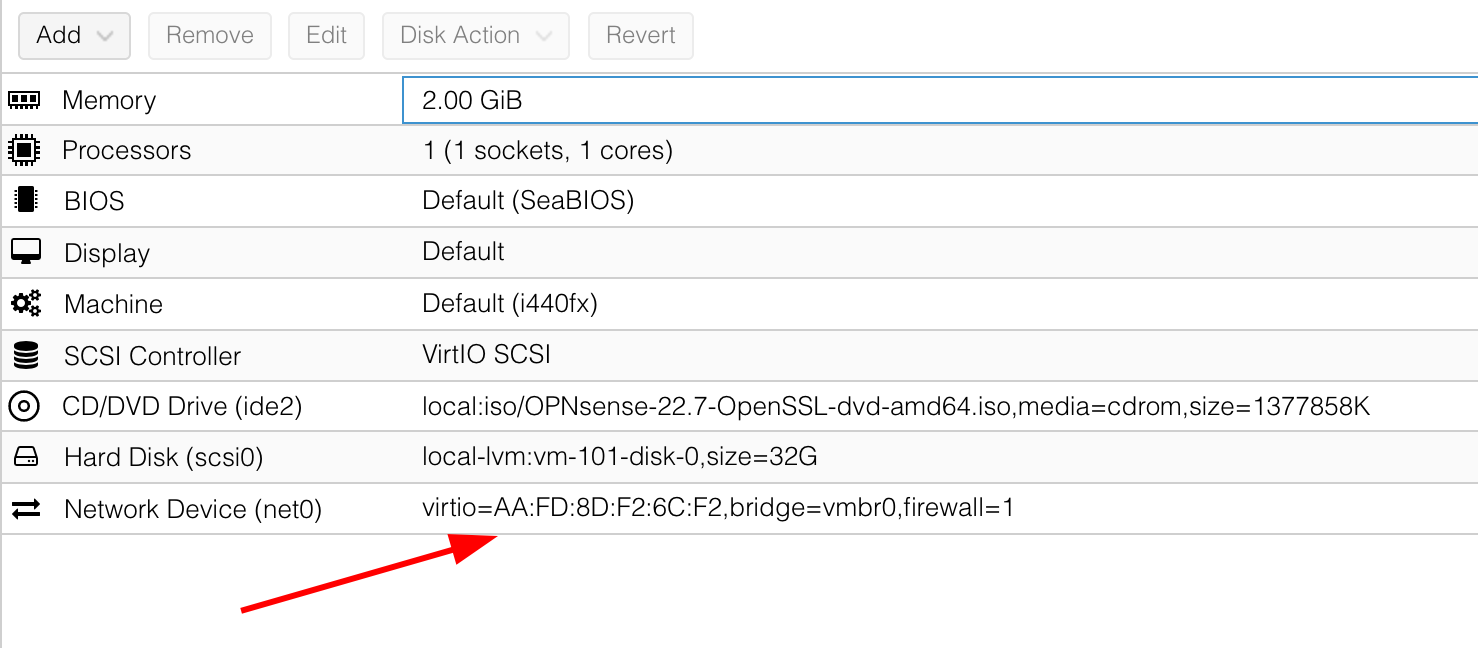
You will see there's one network device added to it that you have selected during the creation process. Make sure this device uses vmbr0 as a bridge and there's no VLAN. We will use this device as a WAN interface for our router.
Now, click Add and select a network device
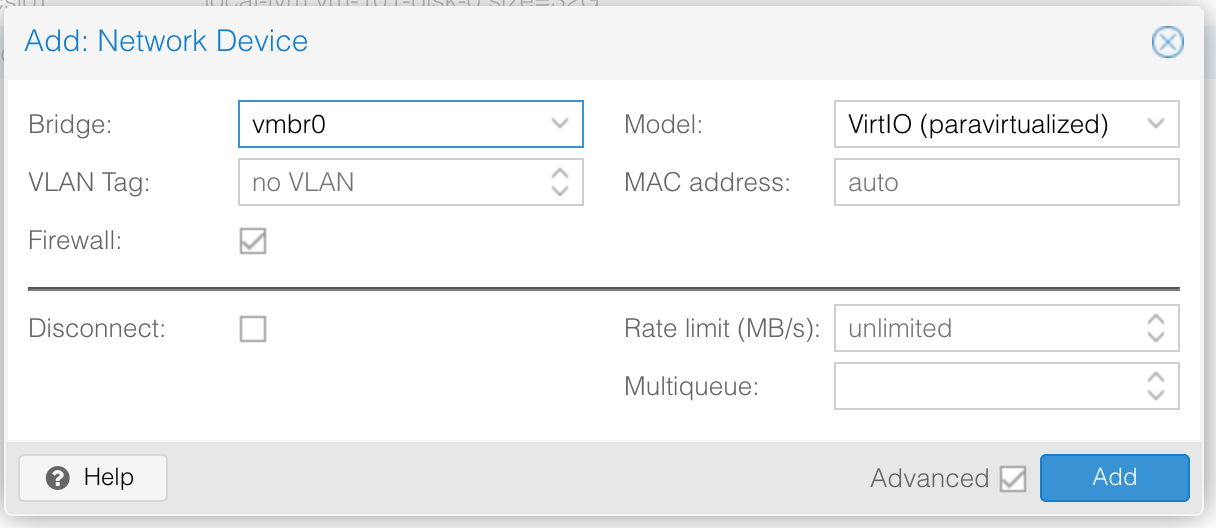
This time everything stays the same as above, the only thing that needs to change is the VLAN tag. Enter a VLAN tag (i.e. 10) that you will use for LAN traffic. It does not matter what you enter but make sure you don't enter a VLAN that switch uses as a Native VLAN ID. Click Add and you're done.
Now, complete the setup of PFSense/OPNSense. Do note that you have to assign the correct WAN and LAN interfaces or else it won't work. In my case, I saw the names vtnet0 and vtnet1 in the setup wizard. So vtnet0 became my WAN as it's the first network device in the hardware tab of the VM and vtnet1 became LAN.
Congratulation, you're almost done.
Configuring Switch
Here the steps will change depending on the switch you use. I will show you how I configured my TP-Link SG108E switch. The basic configuration will stay the same across the switch manufacturer, UI may change.
We are going to pick WAN and LAN ports on our switches. The port that connects to the proxmox machine automatically becomes the WAN port. Now it's up to you to pick LAN ports. In my case -
| PORT | PURPOSE |
| PORT 1 | CONNECTS ISP MODEM |
| PORT 2 | EMPTY |
| PORT 3 | PROXMOX WAN PORT |
| PORT 4-7 | EMPTY |
| PORT 8 | LAN PORT - CONNECTS TO WIFI AP |
After you've decided on WAN and LAN ports make the below configuration to your switch
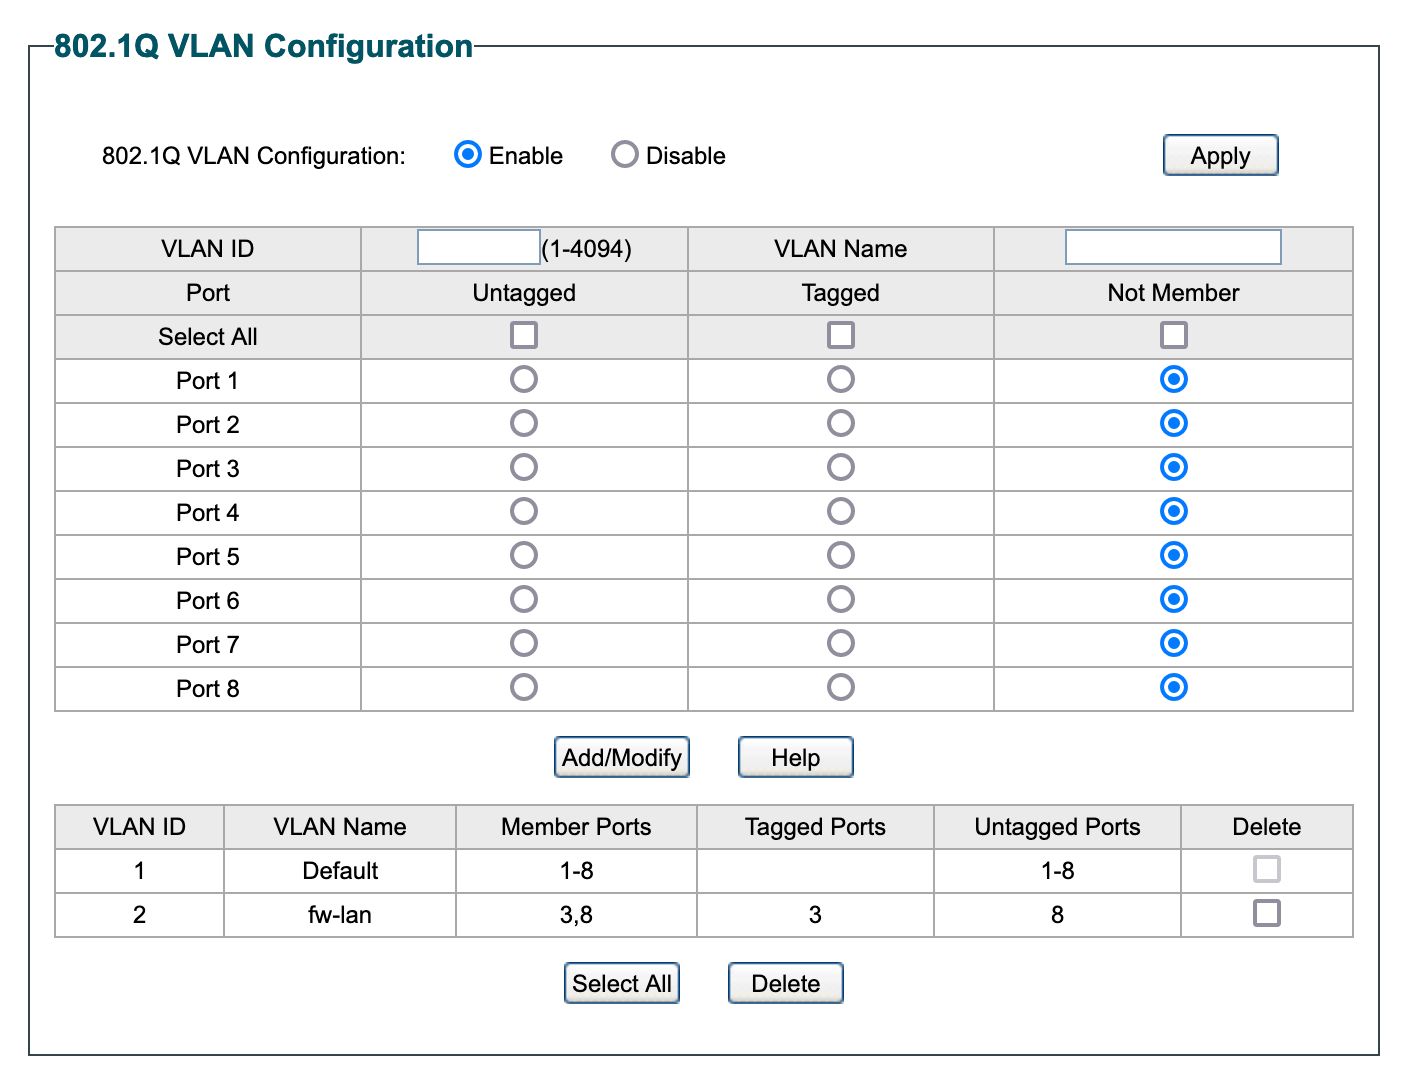
Configure proxmox WAN and LAN to be a member of VLAN ID (i.e. which you've entered in proxmox VM above)
Proxmox WAN port is set as TAGGED port, so it accepts LAN traffic on the above VLAN ID
Proxmox WAN port is also part of native VLAN ID, in my case VLAN 1. Here if you have the default configuration of the switch it should work. This needs to make proxmox WAN work.
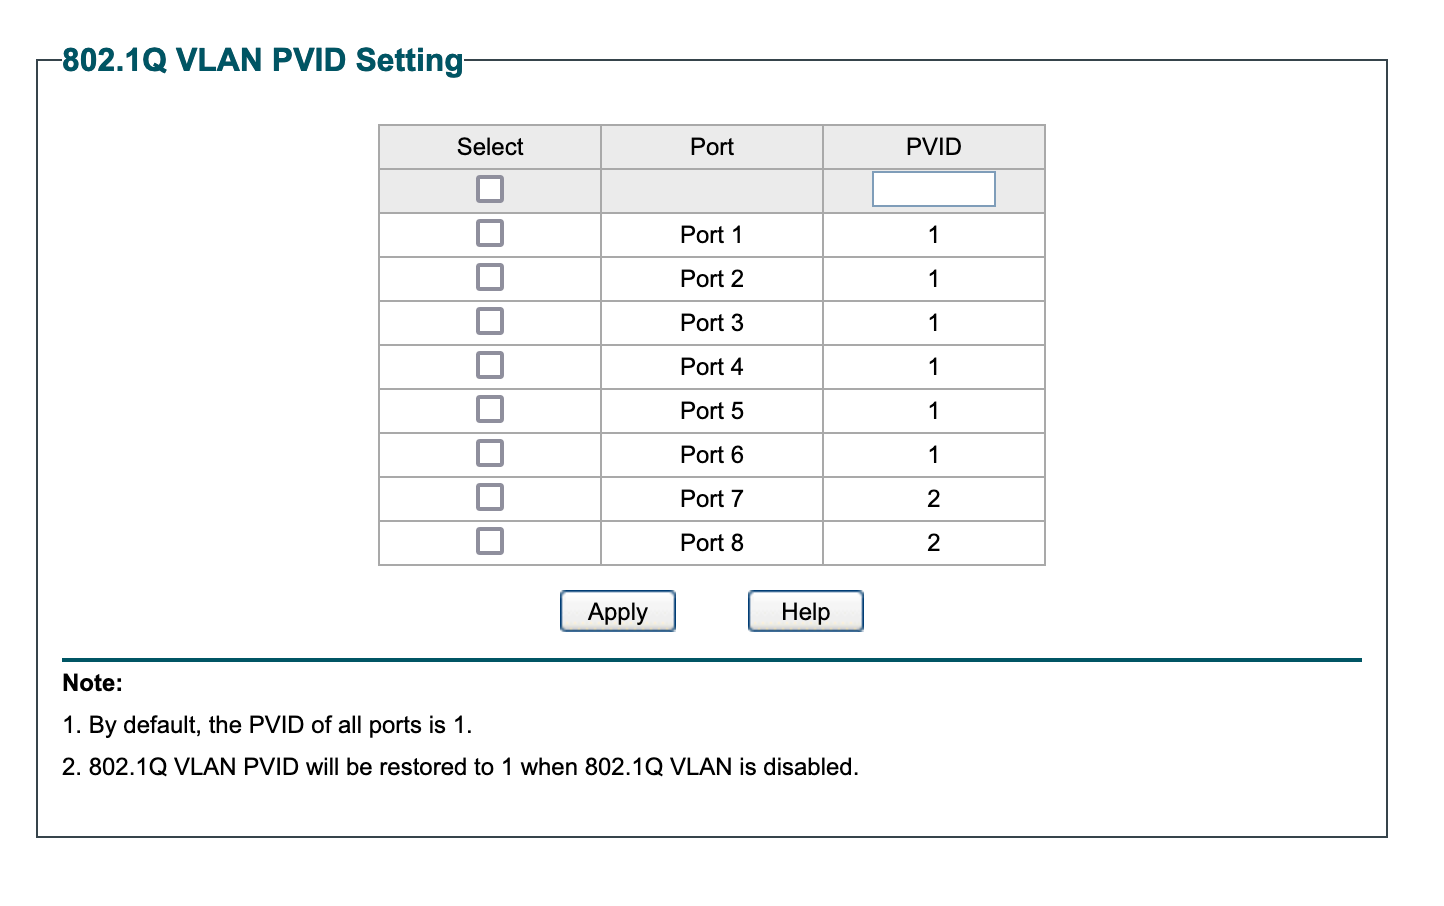
Set LAN port Primary/Native VLAN ID to the VLAN ID you entered above. This is for the devices that do not support VLAN Tagging.
This is how it looks in my switch -
Primary/Native VLAN ID configuration -
Troubleshooting
In case you can't access PFSense/OPNSense from LAN, make sure you've entered the correct gateway and IP address when configuring LAN. I forgot to set the gateway and it took 1 day to figure that out.
Reboot your proxmox host after VLAN configuration if something is not working.
Wait for some time to switch to process the configuration, for me it took a couple of seconds to re-configure the ports.
That's all. Congratulations, you've virtualized your router.